

If you’re creating a game or virtual environment in Unity, adding realistic water effects can greatly enhance the immersion and overall feel of your project. Fortunately, Unity offers a variety of tools and features that make it easy to create convincing water effects, regardless of your skill level.
In this guide, we’ll walk you through the steps for creating water in Unity, from setting up a water plane to adding textures and materials, setting up lighting for realism, adding physics and interactivity, and fine-tuning your water effects. Whether you’re looking to create a serene pond, a raging river, or a stormy ocean, this guide will provide you with the knowledge and tools you need to bring your water to life in Unity. So, let’s dive in!

Creating a Water Plane
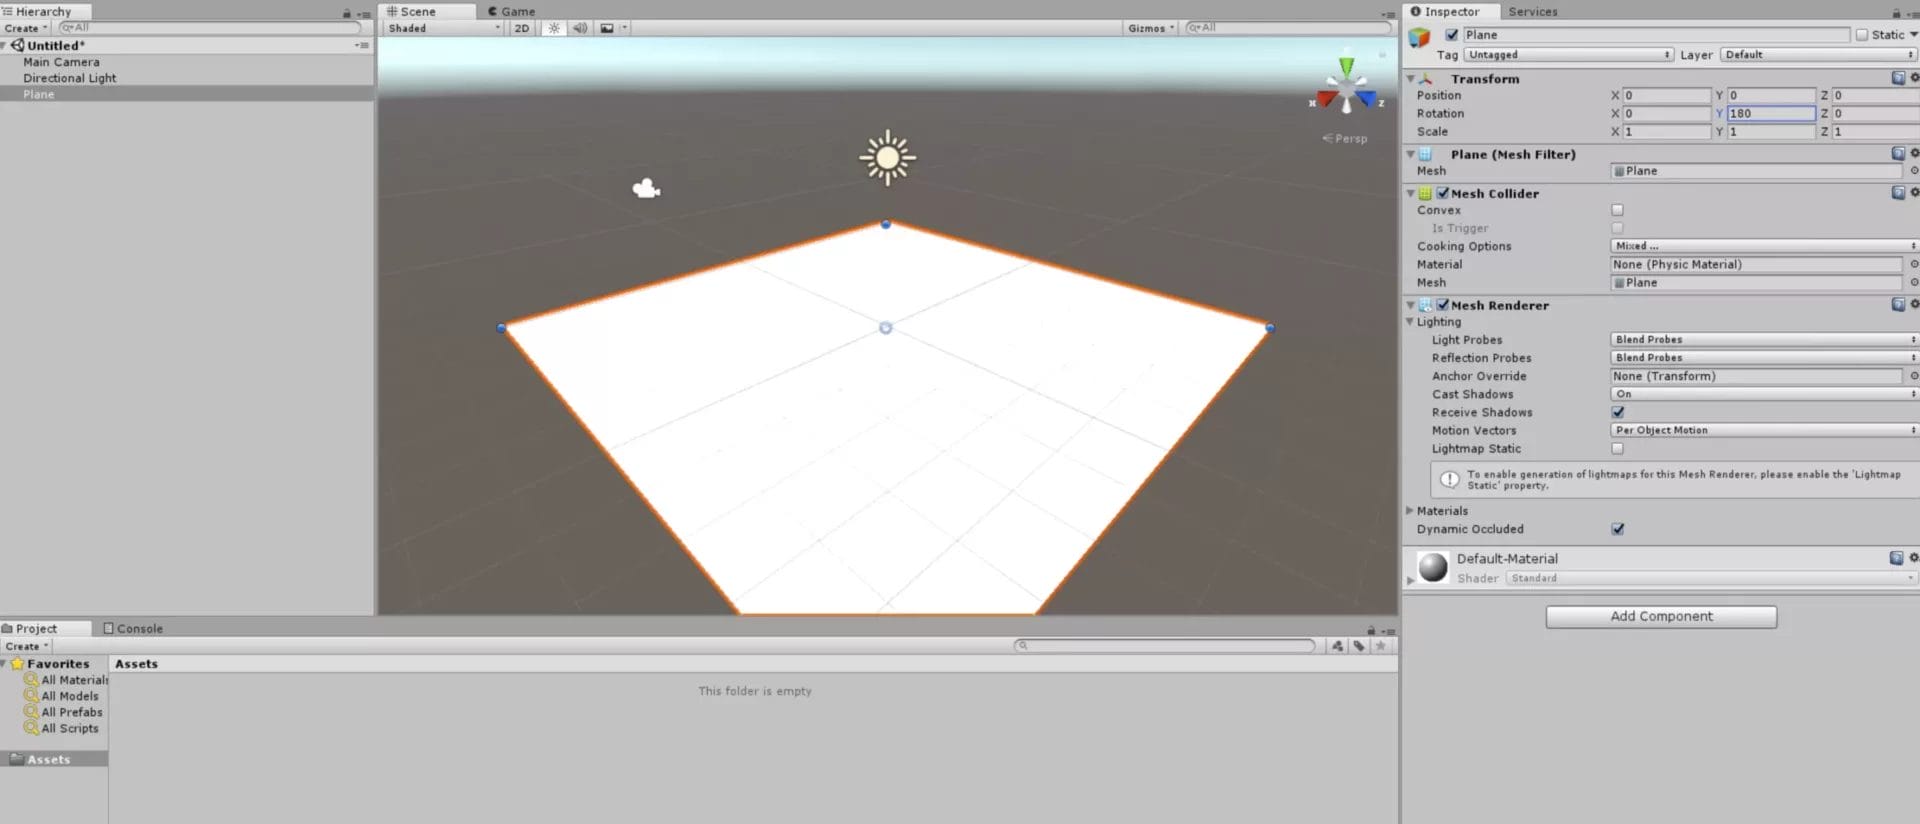
Let’s start by adding a new plane and then squishing it down to create a flat surface for our water to sit on. To do this, go to the GameObject menu, select 3D Object, and then select Plane. This will add a new plane to your scene.
Next, we want to make sure the plane is flat and not tilted. To do this, select the plane in the Hierarchy window, and then go to the Inspector window. Under Transform, you’ll see Rotation. Make sure all the values are set to 0, except for the Y value, which should be set to 180. This will rotate the plane 180 degrees around the Y-axis, making it flat. Now you have a flat surface to work with!
Adding Textures and Materials
To achieve a more realistic look, applying textures and materials to the surface of the liquid can enhance the visual appeal of the scene.
In Unity, this can be done by adding a material to the water plane object. To do this, select the water plane object in the hierarchy, go to the inspector window, and click on the “Add Component”button. From the dropdown menu, select “Renderer”and then “Material”. This will add a new material component to the water plane object.

Once the material component is added, you can select a texture or create a new one to apply to the water’s surface. To do this, click on the material component in the inspector window and then click on the small circle next to the “Albedo”property. This will bring up a window where you can select a texture or import a new one. You can also adjust the tiling and offset of the texture to control how it appears on the surface of the water. With the right texture and material settings, your water in Unity can look more realistic and visually appealing.
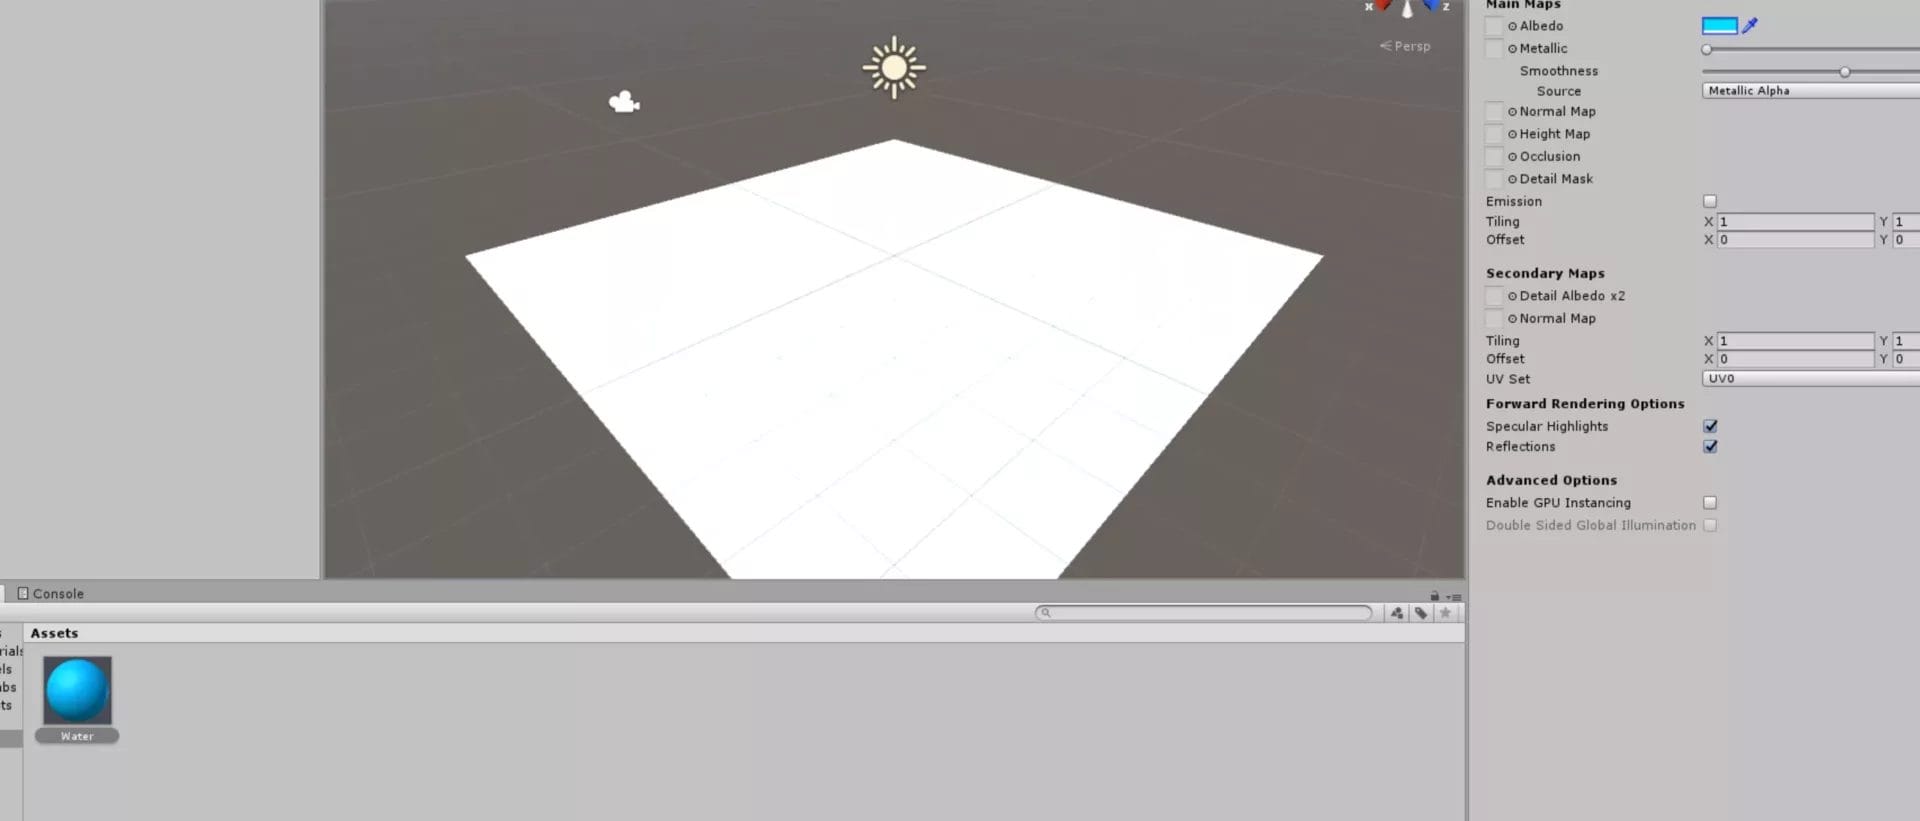
The final result should be a dull water surface win the color of the water that you have selected, not very exciting.
Adding Waves
To spice thinks a little bit up, let’s paste in the shader this simple code that will generate a basic water with some waves.
For this, we will need to creat a new shader, by right-clicking on the assets window,, and from the menu select create->shader->standard surface shader.
Name with as we you want, we will name our WaterRipple.

Double click on the newly created shader and paste in the code for the shader.

Shader "Unlit/Water" { Properties { _MainTex("Water", 2D) = "white" {} _Waves("Waves", Float) = 1.0 _Speed("Speed", Float) = 0.2 } SubShader { Tags { "RenderType" = "Opaque" } LOD 100 Pass { CGPROGRAM #pragma vertex vert #pragma fragment frag // make fog work #pragma multi_compile_fog #include "UnityCG.cginc" struct appdata { float4 vertex : POSITION; float2 uv : TEXCOORD0; }; struct v2f { float2 uv : TEXCOORD0; UNITY_FOG_COORDS(1) float4 vertex : SV_POSITION; }; sampler2D _MainTex; float _Speed; float _Waves; float4 _MainTex_ST; v2f vert(appdata v) { v.vertex.y += cos(v.uv.x * _Waves + _Time.y) * _Speed; v.vertex.y += sin(v.uv.y * _Waves / 2.0 + _Time.y) * _Speed; v2f o; o.vertex = UnityObjectToClipPos(v.vertex); o.uv = TRANSFORM_TEX(v.uv, _MainTex); UNITY_TRANSFER_FOG(o,o.vertex); return o; } fixed4 frag(v2f i) : SV_Target { // sample the texture fixed4 col = tex2D(_MainTex, i.uv); // apply fog UNITY_APPLY_FOG(i.fogCoord, col); return col; } ENDCG } } } Once pasted, save and the shader should be compiled without errors.
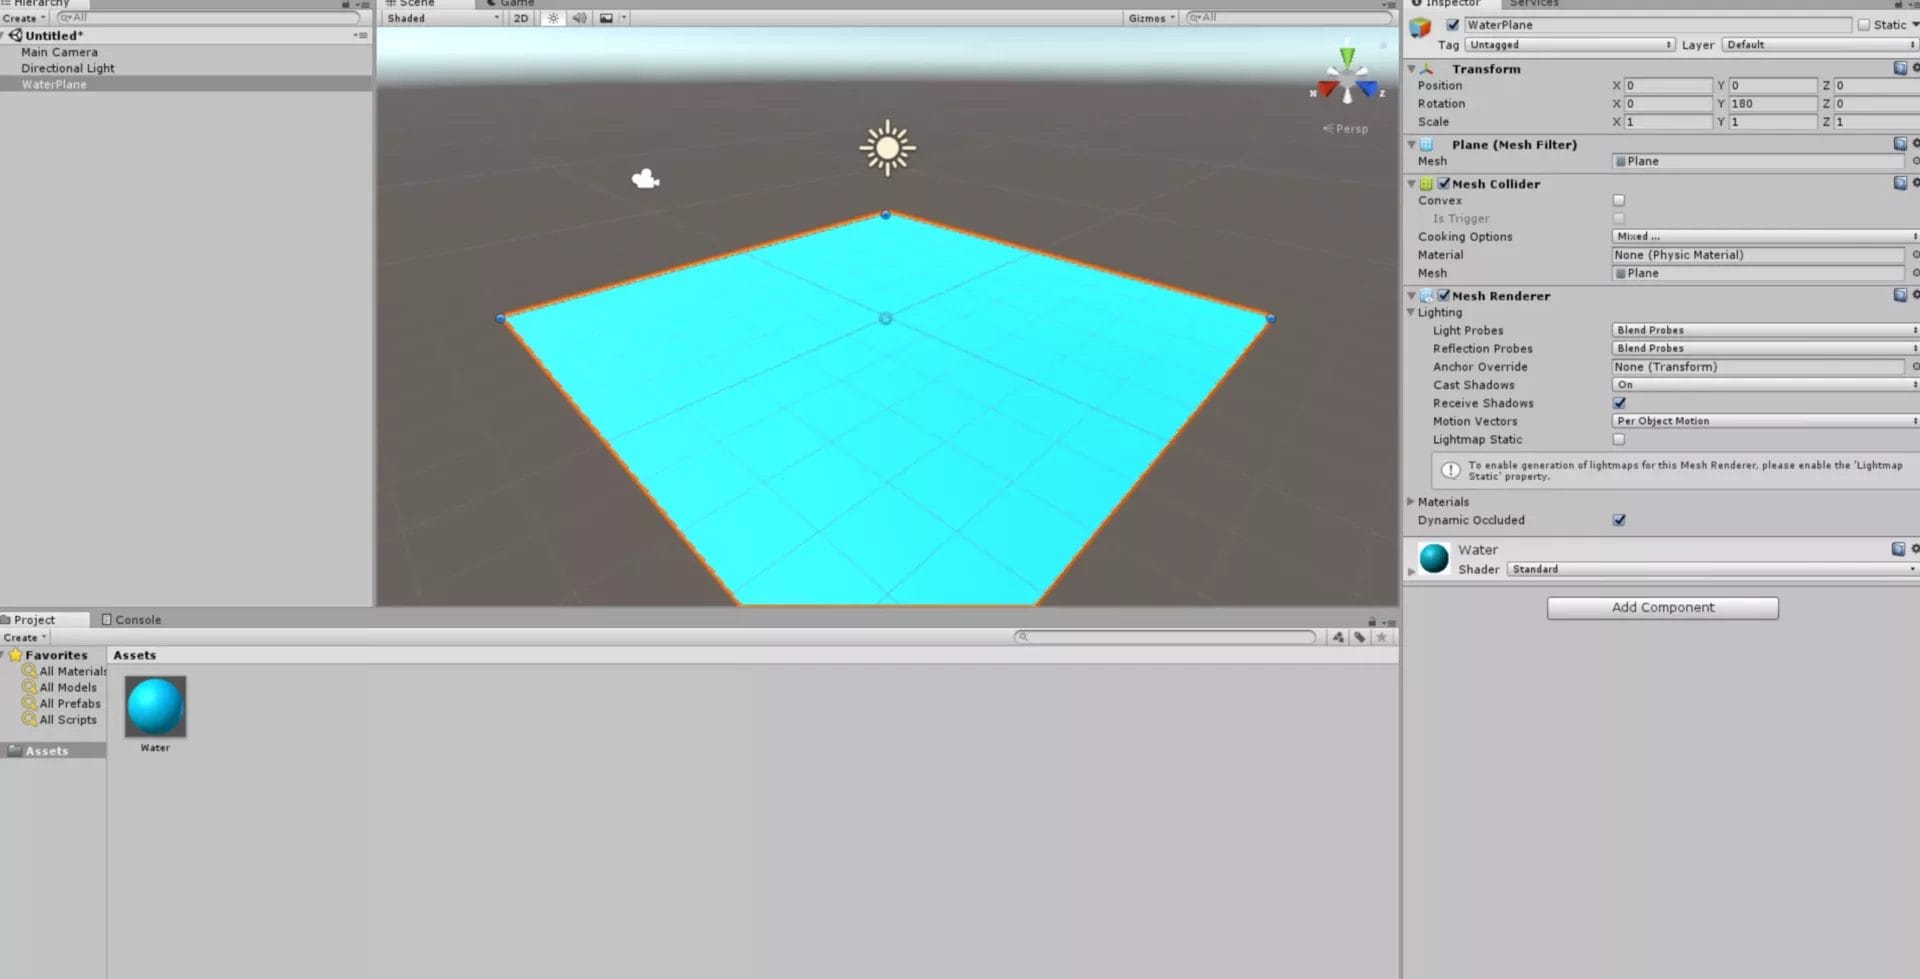
In the material select the new shader from “unlit”.
And drag it to the water plane.
Your should have now a white water.
In the inspector pane, there is a new field called WATER where we can define the Water texture.

From the following link, select the textures that you liked the most, and import it into unity and then into the Water slot.
https://www.cadhatch.com/seamless-water-textures
Play around with the Waves and Speeds values and you should see your water starting to move.

Adding Physics and Interactivity
Adding physics and interactivity to your Unity scene can bring it to life, allowing players to interact with objects and experience a more dynamic and engaging environment. One way to add physics to your scene is by using Unity’s built-in physics engine, which allows you to add realistic movement and collision detection to your objects.
For example, you can add gravity to your scene so that objects fall and bounce off each other, or you can create joints between objects to simulate realistic movements like swinging or rotating.
Another way to add interactivity to your scene is by using scripting to create custom behaviors for your objects. You can use C# or UnityScript to create custom scripts that control how objects behave in response to player input or other events. For example, you could create a script that allows the player to pick up and move objects around the scene, or you could create a script that causes objects to explode when they collide with each other. With a little creativity and some programming know-how, the possibilities for creating interactive and dynamic scenes in Unity are endless.
Fine-Tuning Your Water Effects
Now that you’ve got the basics down, it’s time to perfect those water effects in your Unity scene by adjusting the settings and experimenting with different textures and lighting.
One of the key settings to fine-tune is the water’s transparency. Depending on the environment you’re creating, you may want the water to be crystal clear or murky. Adjusting the transparency can create a more realistic effect and add depth to your scene. You can also adjust the water’s color, reflection, and refraction to achieve the desired effect. Experimenting with different textures and lighting can also enhance the water’s appearance. Adding ripples, waves, or foam to the surface of the water can create a more dynamic effect. Additionally, adjusting the lighting can change the way the water appears, making it look more realistic and adding depth to your scene.
Another way to fine-tune your water effects is by adjusting the water’s movement and behavior. Unity offers several options for water movement, including simple and complex wave types. Experimenting with different wave types can create a more realistic effect and add movement to your scene.
You can also adjust the water’s speed and direction to create different effects. For example, a calm lake may have slow, gentle waves, while a river may have fast-moving rapids. Adding buoyancy and physics to objects in the water can also create a more realistic effect. By adjusting the water’s movement and behavior, you can create a dynamic and immersive environment that enhances your scene. With a little experimentation and fine-tuning, you can create stunning water effects that bring your Unity scene to life.
Let us now in the comments if you want a second part for this article and move the shader to more advanced effects.
Frequently Asked Questions
How do I make my water interact with other objects in my scene?
To make water interact with other objects, use a physics engine and add colliders to the objects. You can also adjust the water’s buoyancy and viscosity to create more realistic interactions.
Can I create different types of water, such as waves or rapids, using Unity?
Yes, Unity offers various ways to create different types of water such as waves and rapids. It provides various water assets and tools to customize water materials, textures, and physics to achieve the desired effect.
How can I make my water look more realistic with reflections and refractions?
To make water look more realistic with reflections and refractions, adjust the material’s reflective and refractive properties. Use a reflection probe to capture and display the environment’s reflection. Additionally, use a water shader to create waves and ripples for added realism.
Is it possible to animate my water to create splashing or flowing movements?
It’s possible to animate water in Unity to create flowing movements and splashing effects. By using various techniques such as particle systems and physics simulations, you can bring your water to life and add a new level of realism to your game.
How do I optimize my water effects for better performance in my game or application?
To optimize water effects for better performance, consider reducing the number of vertices, using lower resolution textures, and adjusting the shader complexity. Additionally, use LODs and culling techniques to minimize the amount of water being rendered.
Conclusion
Making water in Unity may seem like a daunting task, but with the right techniques, it can be achieved easily. In this article, we have discussed the step-by-step process of creating a water plane, adding textures and materials, setting up lighting for realism, adding physics and interactivity, and fine-tuning your water effects.
By following these steps, you can create water that looks and behaves realistically, adding a whole new level of immersion to your game or simulation. With Unity’s powerful tools and your creativity, the possibilities are endless. So don’t hesitate to dive in and start creating your own water today!
For more unity tutorials or other game development topics, don´t forget to check our blog.
Related Posts:


A game developer that wants to share its knowledge and experience with other game developers-


